
First time gardeners who are starting to learn how to grow their own transplants from seeds are often intimidated by the thought of setting up their own small growing operation. There are many different methods used by experienced gardeners including heating pads, propagation benches, temperature controlled fans, pH meters, lights, micro-nutrient solutions and more, but the truth is, we humans can tend to make things a bit more complicated than necessary.
All you really need to start your own tomato plants are seeds, soil, water and light. Think about how plants start growing in nature, all by themselves, without home laboratories.
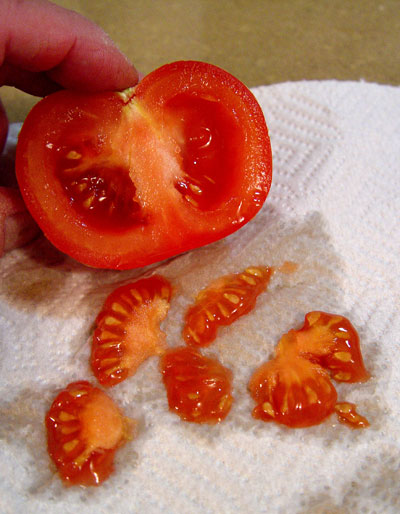
A tomato falls to the ground and starts to rot. The gel of the tomato (which is a natural seed germination inhibitor), protects the seeds from growing too soon. As the seasons change, the seeds lay on top of the ground. By spring time, they flow across the soil carried by run off, until they get nested in a small crack in the soil.
Here they will lay dormant until they receive just the right combination of moisture, heat and light naturally. A seed has enough energy stored within itself to germinate. As long as it does not dry out during this delicate stage, it will form small roots that reach deep into the soil looking for food and water. The leaves will form and grow up towards the light. As photosynthesis converts this light into energy, the plant grows stronger.
So how do we mimic this germination process within our home? We use the seeds that we had collected last season. They had been stored in a cool, dark, dry environment to ensure the germination rate stayed high. We will recreate the ‘spring run off’ by planting our dried seeds in the soil or pellet growing media.
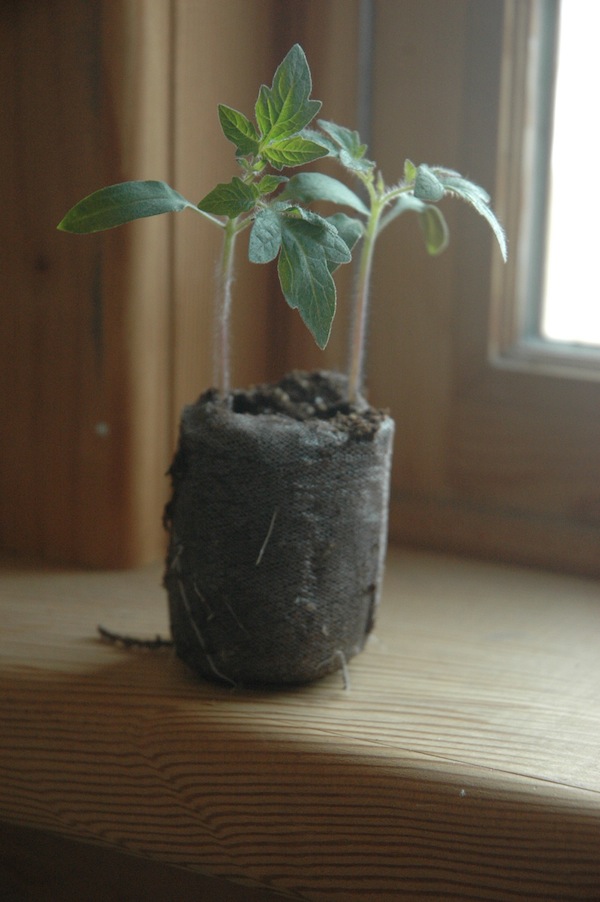
By placing the seeds slightly below the soil surface, the goal is to have moisture touching all areas of the seed at all times. By having the seed coating softer, the plant will be able to emerge easier. Imagine trying to bite into a dry bean vs a soaked bean.
In nature, it’s survival of the fittest. Some seeds get eaten by birds and rodents, some seeds are too deep and lay dormant until they are moved closer to the surface heat later in the season or a few years later by nature or a rototiller. Some will dry out from wind and heat before they have time to grow a strong root system. The goal of planting seeds indoors, is to create a controlled environment best suited for seed germination.
In the home we have pets or children bumping trays or moving the name tags ‘environmental impacts’, forgetting to water ‘drought’ or over watering ‘floods’ but for the most part, we can plant seeds into soil or media and mimic nature, indoors.

The seeding tray can be a nursery flat, an old milk container, recycled plastic containers or old pots. The goal is to contain the soil and not get the house too wet. Home gardeners will store soil in the fall to have available for early seeding. My grandmother used to use an old electric hot plate to sterilize the soil before using it for seeding, while other pioneers placed soil in the oven or on the wood stove in a pot. They were attempting to kill any soil borne diseases that would keep the seeds from growing. This method can stink up the house pretty quickly too and not recommended.
Today we have seed starting soil available to purchase, and sterile peat pellets that expand when warm water is added. These products work great for starting the seeds, but keep in mind they lack nutrients (sources of food) for the seedlings once they start to grow. Do not add fertilizer at this stage. When the seedlings are large enough, they will be potted up with nutrient rich soil.
Once the seeds are planted just slightly below the surface of the wet soil, the trays can be moved to a warm area to germinate. To keep the newly emerging seeds from drying out, we place a layer of saran wrap or poly over the tray. This creates a small greenhouse effect and keeps water from evaporating before the seeds start to grow. This would be the hardest part to learn, but once you master this, you are ready to start any types of seeds. The soil should be damp enough that the seedlings do not dry out, yet the plant roots are not sitting in pooled water.
If the pellets were completely soaked in water for a few hours before seeding, there is enough moisture to last about a week depending on how dry the house is. The next watering is usually 2-4 cups of water in the tray so the pellets soak it up from the bottom vs. pouring water on top. As long as there are small water droplets of evaporation on the plastic, there is enough water for the seedlings to get started.
Lots of growers have great luck without grow lights, by keeping the pots in a window area. By turning them often, the plant moves back towards the light, which helps the stem grow stronger. This mimics an outdoor breeze.
It isn’t always necessary to have grow lights to start your seeds but if you do manage to purchase or set up a shelf and light system, it will definitely pay off in it’s first year. The goal is to have the light source as close to the plants as possible to deter long spindly plants that are weaker to transplant. If you have space in your home or basement, you can set up a shelf and hang a grow light. In the commercial nursery we have a great system of lights and heat sources, but some of our best plants come from our small set up in the house.
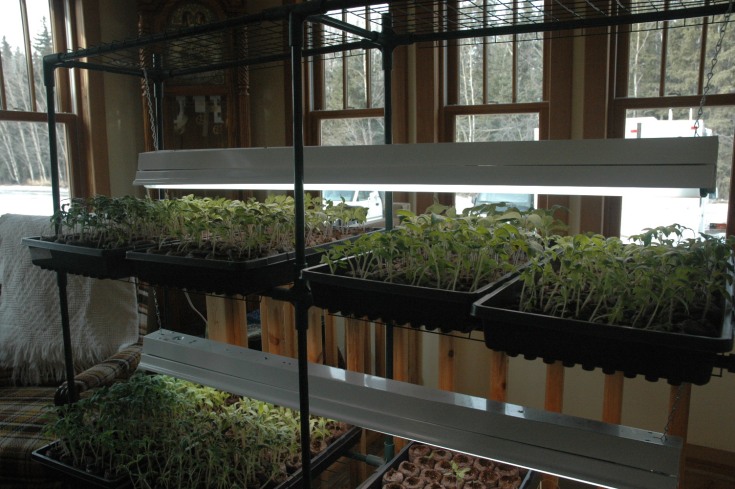
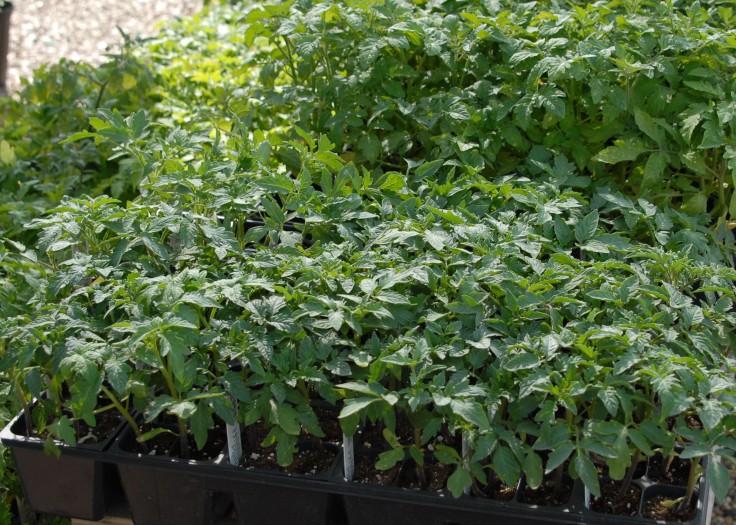
Once the seedlings are about an inch high, we take off the plastic to allow for more air circulation. This will deter rot and diseases while helping the plant grow stronger. Now that the seedlings have reached the two leaf stage, we ‘pot them up’ which means thinning or transplanting each tomato into a bigger pot where it can have more food and space to grow. In the nursery, we pot up to a P18 (18 small pots per tray). In the house, we can pot up to the next size cottage cheese container. The goal is to help the plants grow stronger and larger in its own space. Some growers add nutrients and fertilizers at this stage, but we have never used anything other than rich organic healthy soil to grow dark green, strong, healthy plants.
Grower Tip: When transplanting tomatoes, you can place the plant deep in the soil so only the top few leaves are exposed. New roots will form along the stem in the soil creating a stronger, hardier, healthier plant. This also applies to transplanting spindly plants into the garden or greenhouse later in the spring if the transplants became too tall.
Once you start to learn what works in your own environment, you will be able to start other types of seeds. Start with a few plants and keep it fun.
Heritage Farm is an educational nursery for Canadian Small Farms & Urban Agriculture. Learn permaculture design, how to build a greenhouse, save seeds, raise chickens, build raised beds, grow organic food, and begin your journey towards a sustainable, healthy, lifestyle. Visit Heritage Farm.ca

Leave a comment